
NFTs or non fungible tokens are all the rage right now. While most people have started paying attention to them due to the headlines about artwork or digital collectibles being sold for huge sums, many are waking up to the potential of how they’d disrupt the collectible space. So, if you are wondering how you can create an NFT yourself, then you’ve come to the right place.
Follow the simple steps below to create a non fungible token for your original creation. Do note that you’d need to have some Ethereum yourself and have stored it on wallets such as Metamask.
Step 1: Create an account on an NFT website
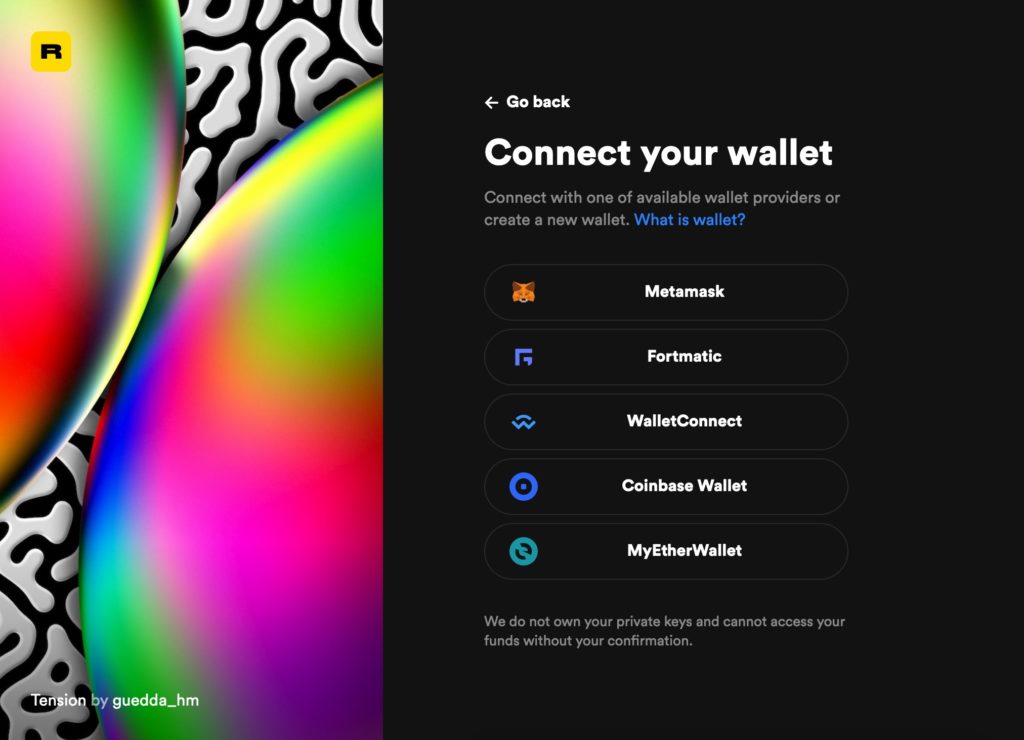
The first step is for you to create an account. As we’ve mentioned before, there is a slew of NFT marketplaces, but we’d be using Rarible for this demonstration. You simply need to connect your wallet with Rarible to do this.
Step 2: Create a collectible
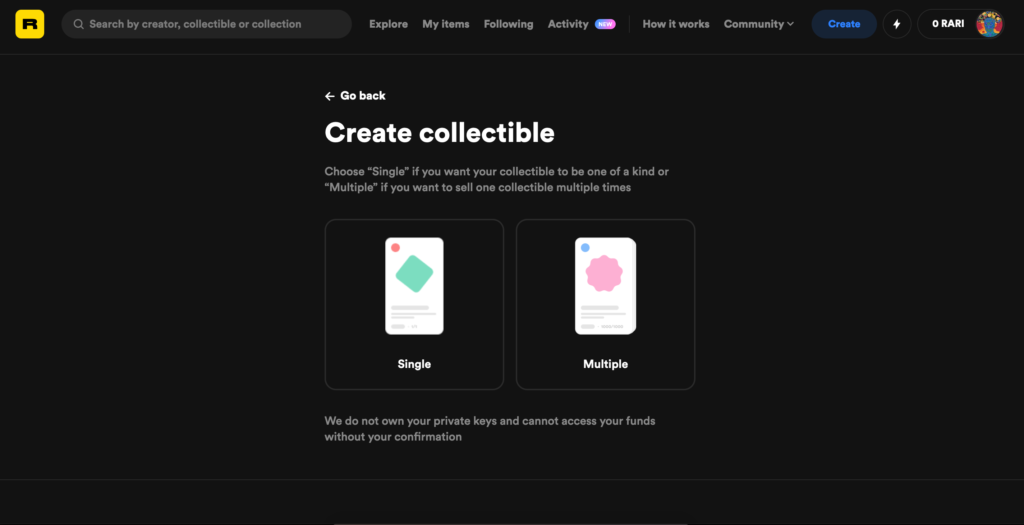
Once you’ve connected your wallet, you’ll be seeing the Rarible homepage. Simply click on the Create option on the top right corner. Here you’ve to mention whether you’re creating a single collectible or multiple. What that means is whether the unique item that you’re selling has only one copy or can have multiple copies. Now we don’t have to explain the value of just having one copy (the price would be higher), so this is a crucial decision to make for yourself.
Step 3: Add your collectible
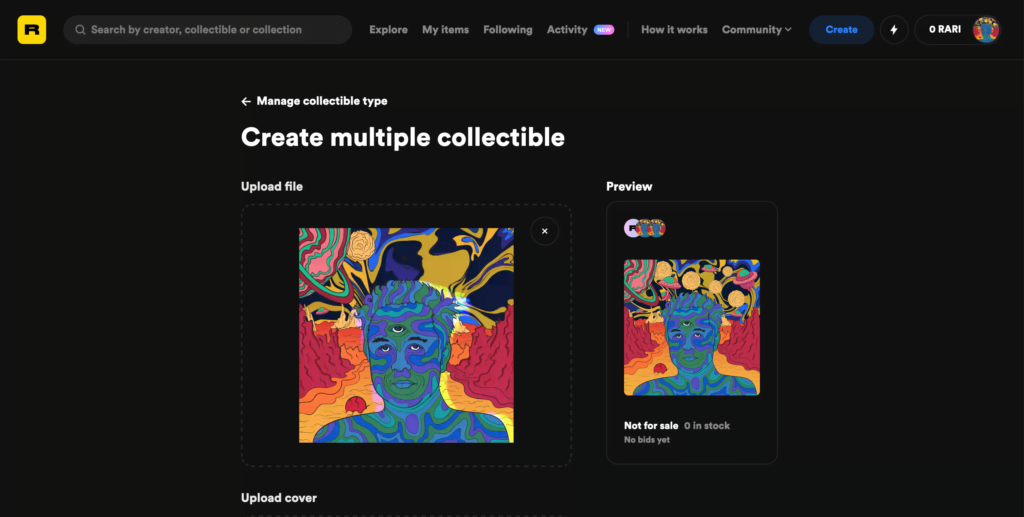
This is the most important part of the process. Here, you have to choose whether you’re starting from scratch or already have something ready. Once you select that, you get an option to upload your collectible. In terms of formats, Rarible supports the usual ones — JPG, PNG, GIF, MP4, and more.
Step 4: Add details about the collectible
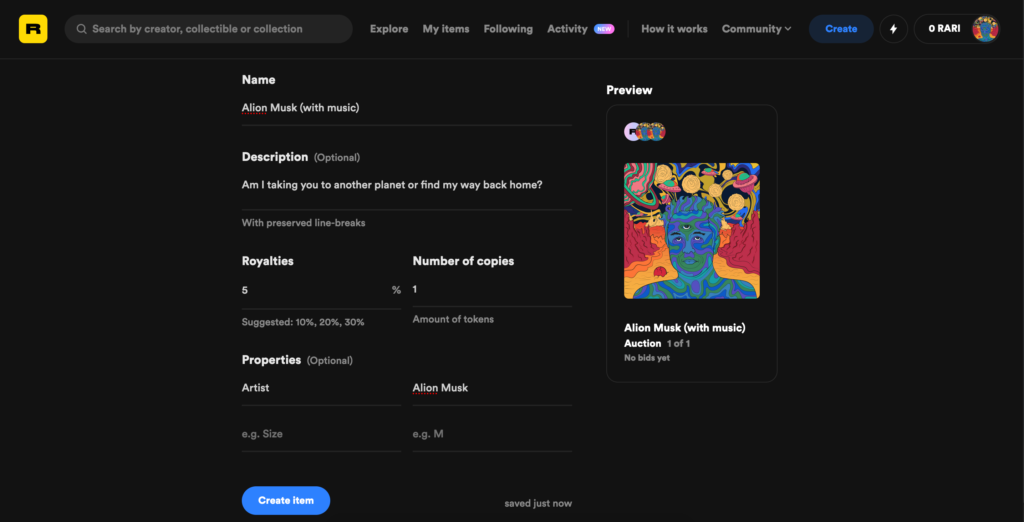
In this step, you’ll need to provide details about the collectible, including its name, description, and royalty info. The royalty point is important as you’d get a 100 percent amount when you sell your creation for the first time, but afterwards, you can choose to get 10 percent (or more) royalty, every time, it’s sold to another person.
In this step, you can also add additional optional details such properties of your collectible.
Step 5: Set the price and you’re done!
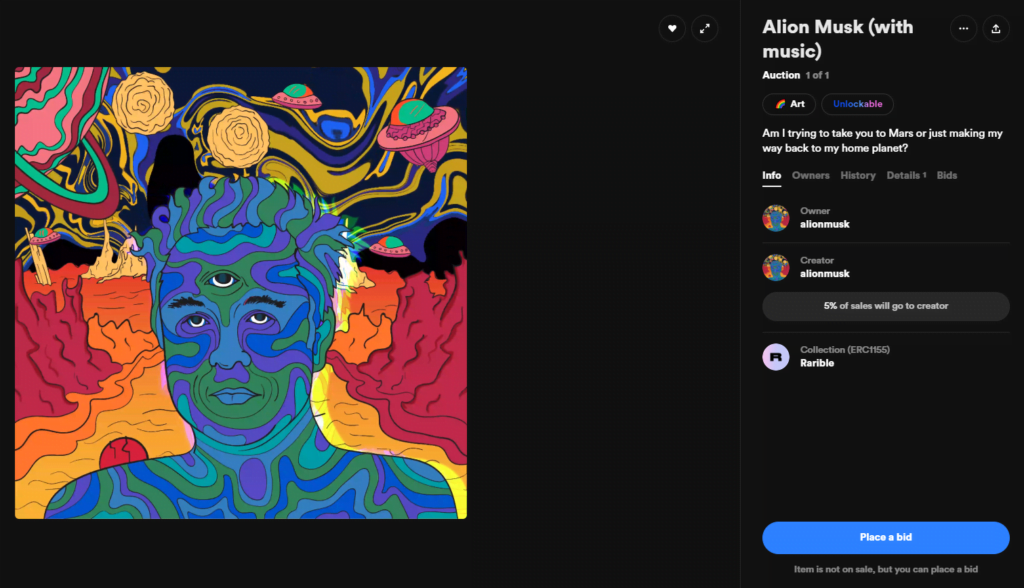
Congratulations! You’ve created your first NFT (click here to view the NFT we’ve created in this guide).
Note that Rarible charges 2.5 percent as a commission. So, if you’re selling your artwork for $100, then $2.5 would go to the platform. Do note that the value of the collectible needs to be in Ethereum. Additionally, for recording the transaction on the blockchain, you’ll need to pay the Gas fees. This is an important point since your artwork may not be bought, but you’d be spending money before even getting a chance to sell it in case you want to get the benefits of using the blockchain.
There you go! As you can see, creating an NFT isn’t rocket science. The only thing is that you need to have Ethereum with you already, and of course, a unique item that’s worth selling.
Can I sell a domain name and website this way?
i got a little confused of this part:
it would be great if someone guide me where i can get more info of that
” Note that Rarible charges 2.5 percent as a commission. So, if you’re selling your artwork for $100, then $2.5 would go to the platform. Do note that the value of the collectible needs to be in Ethereum. Additionally, for recording the transaction on the blockchain, you’ll need to pay the Gas fees. This is an important point since your artwork may not be bought, but you’d be spending money before even getting a chance to sell it in case you want to get the benefits of using the blockchain.
There you go! As you can see, creating an NFT isn’t rocket science. The only thing is that you need to have Ethereum with you already, and of course, a unique item that’s worth selling.”
thank you